Getting Started with Jenkins + Android

Everything seems difficult until it is done!! I have been exploring Jenkins for a while now. When I started I didn’t know that I would face difficulty in doing the basic setup of Jenkins for building an Android project. Fortunately, I was able to make my way out after toiling for almost a week. Though Jenkins is easy to set up, it is not that easy when used for building Android Project. If you are also facing some problem, then read my post below to avoid difficulty in the setup of Jenkins for building Android project. Let us start with brief introduction of Jenkins.
Jenkins is an open source automation server. With Jenkins, organizations can accelerate the software development process by automating it. Jenkins manages and controls software delivery processes throughout the entire lifecycle, including build, document, test, package, stage, deployment, static code analysis and much more. — Cloud bees
As this is a basic setup tutorial for Jenkins + Android, I’m not going to explain what is Jenkins and how to play around it or How to configure advance setup for Android and other stuff! There are huge amount of YouTube videos and free courses out there on Jenkins! Go and check them out first if you don’t know your way around Jenkins! This tutorial is only intended to demonstrate basic Jenkins setup for Android Projects!
Here are the steps that we are going to follow:
Steps
- Jenkins Installation.
- Setting up Jenkins.
- Configure Jenkins for Android.
- Configure an Android project in Jenkins.
- Build Android project.
- Archiving Artifacts(APKs).
1. Jenkins Installation
Jenkins installation is pretty much straight forward for both Windows and Mac! First we need to download Jenkins from below link.
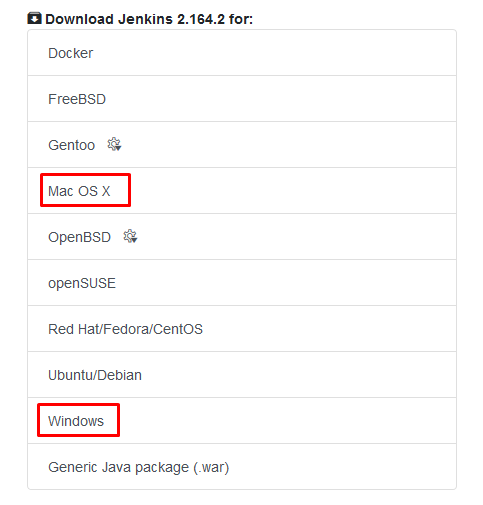
Download appropriate file for Windows/MacOs from the link. For Windows, it will be a zip file that contains a .msi installation file. For mac, it would be a **.pkg** file that will install Jenkins on MacOs.
Bonus
You can also download Generic Java package (.war) and run it from command line/terminal. Following command will run Jenkins from .war file. Make sure that java is installed properly.
java -jar jenkins.war2. Setting up Jenkins
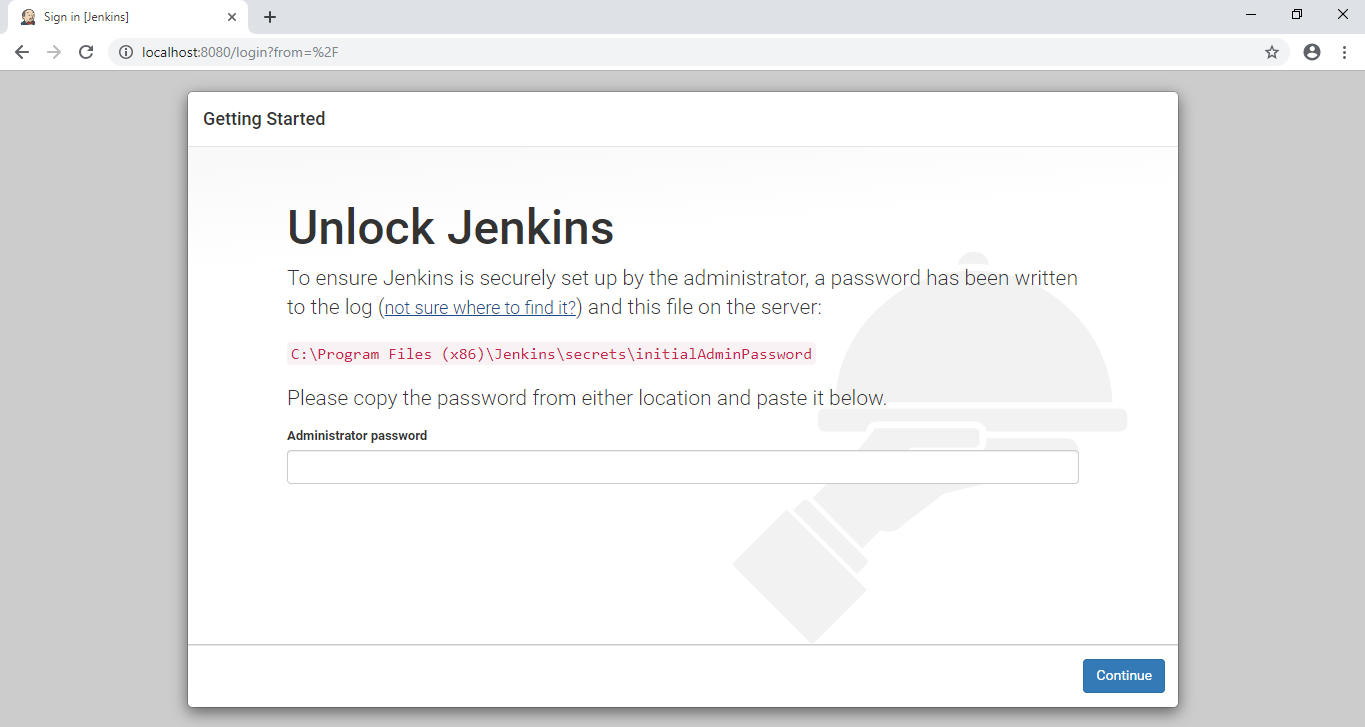
After installation is done, a webpage running on local host will be opened automatically like this:
If it doesn’t open automatically then you can hit this URL.
Unlock Jenkins
By default Jenkins is locked and it requires an unlock key that is written in a file named initialAdminPasswordwhich is stored at the red highlighted path. The path would be:
For windows:
C:\Program Files (x86)\Jenkins\secrets\initialAdminPasswordFor Mac:
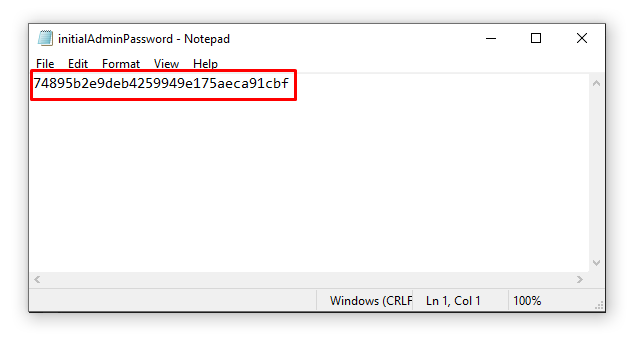
/Users/Shared/Jenkins/Home/secrets/initialAdminPasswordOpen the specified file highlighted in the page in a text editor, copy the unlock key and paste it on the page and click continue.
After that, a new page will be open titled “Customize Jenkins” as shown below. We will go with the “Install suggested plugins” option as it will install basic plugins like git, subversion, gradle, etc.

After selecting Install suggested plugins, an installation page will show up that would contain list of plugins which are being installed as shown below:
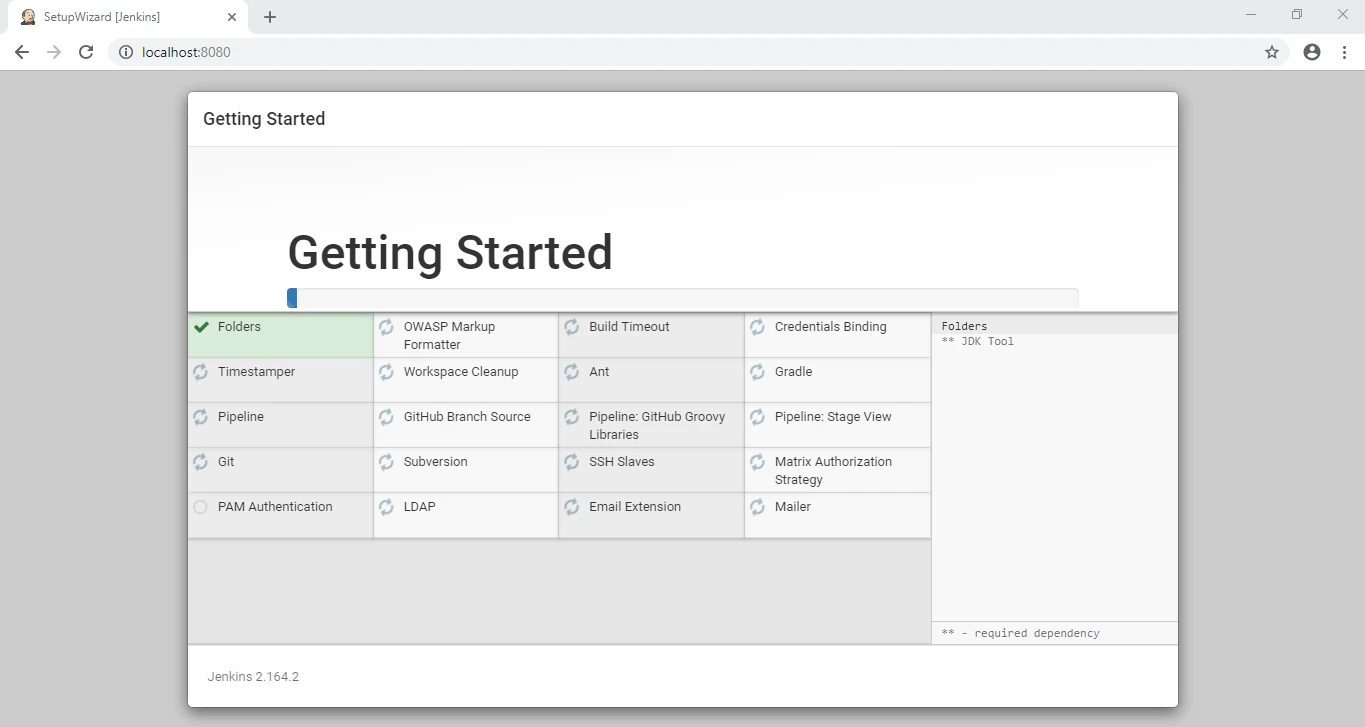
Wait for all the plugins to be installed. It will take a few minutes! After the installation is completed, it will ask to create First Admin User as shown below:
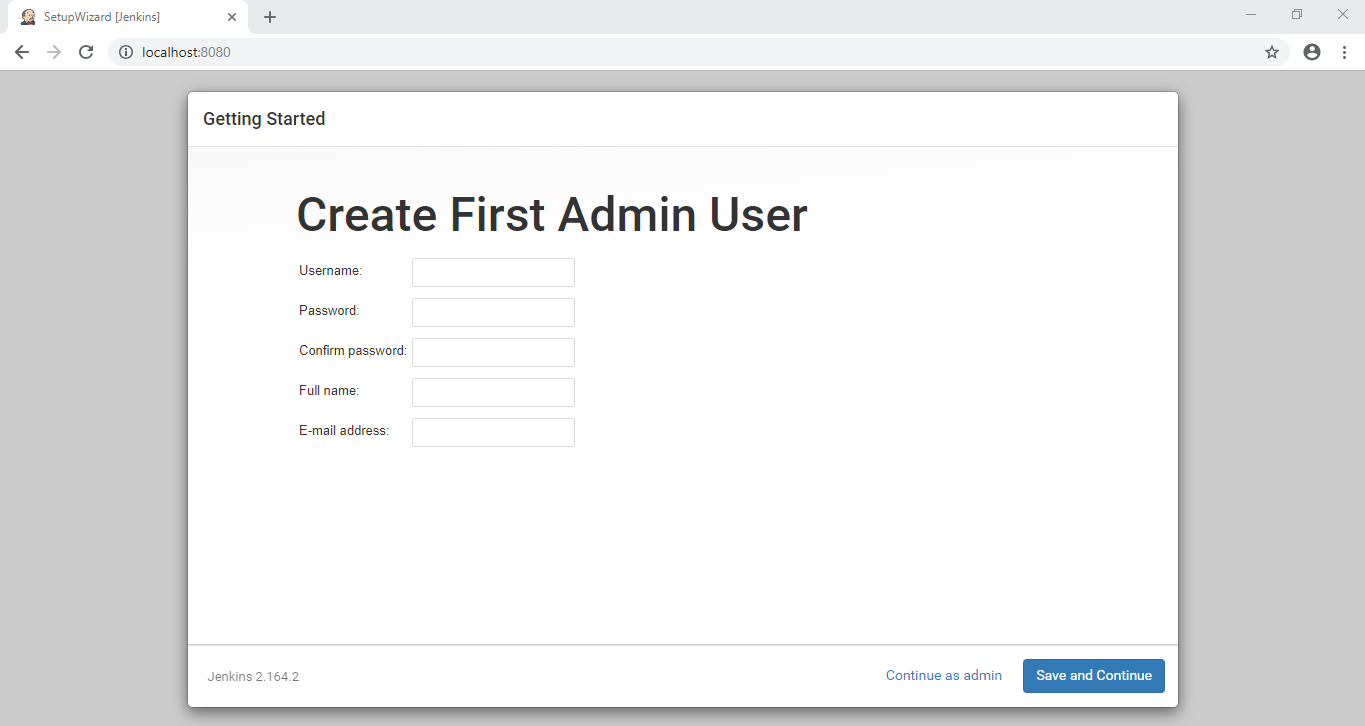
Fill the required information and click on Save and Continue.
Remember, this username and password will be used to login into Jenkins.
After that, Instance configuration page will show up as shown below:
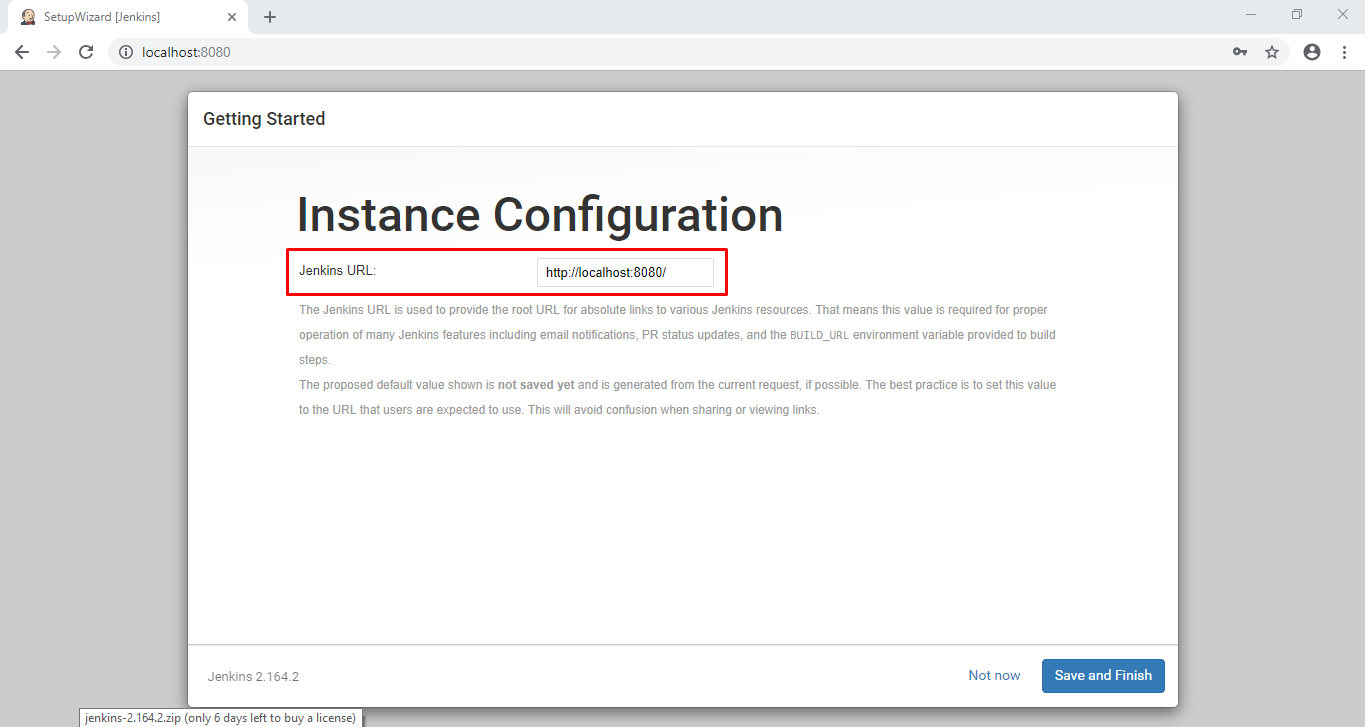
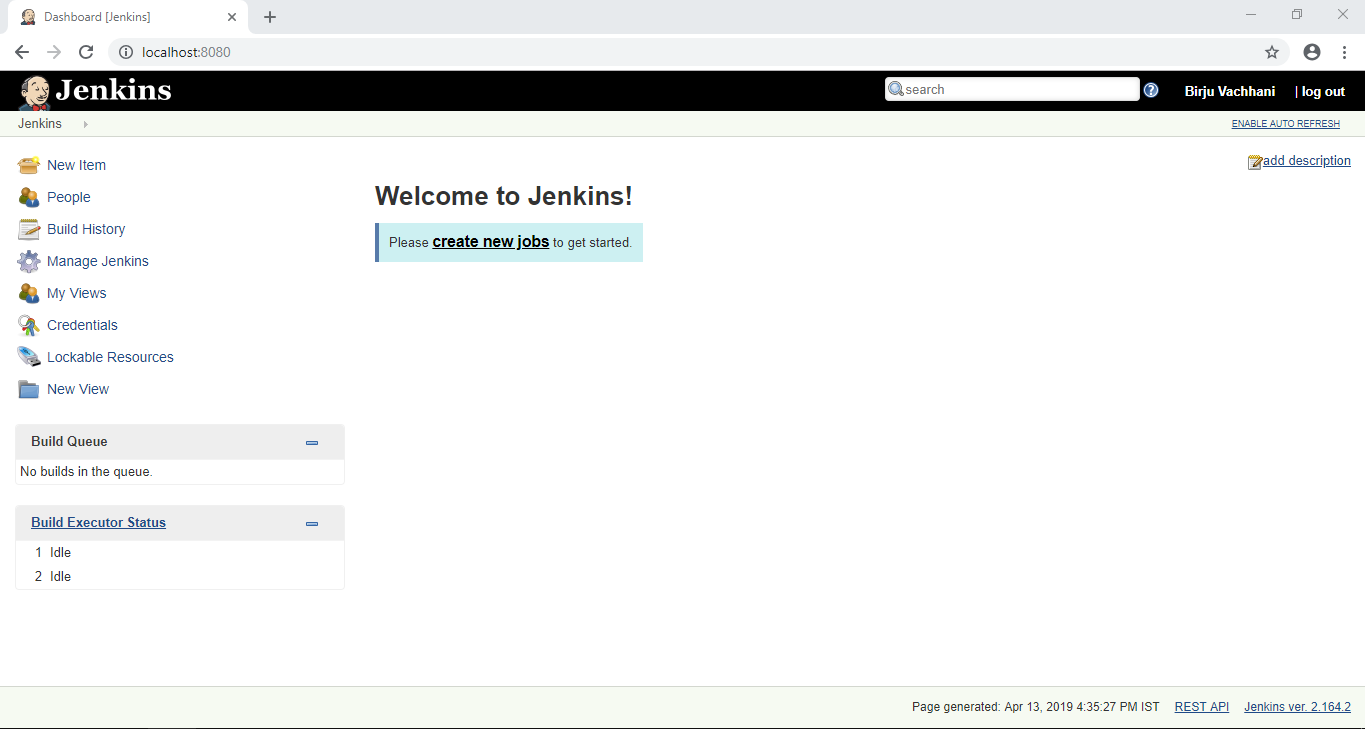
You can change the default Jenkins URL if you want to. I’ll be using the default one. Click on save and finish to finish the setup. Click on Start Using Jenkins and Jenkins Dashboard will be displayed as shown below:
3. Configure Jenkins for Android
Now, this is the tough part! To build Android project in Jenkins, a couple of things are needed as listed below:
- Git
- JDK
- Gradle
- Android SDK Tools
As we have chosen to install default plugins, git and gradle plugins are installed by default! We need to install Java and Android SDK Tools.
Setting up JDK
You can download and install java-jdk from here for respective platforms and install it. Java is very easy to install indeed! After JDK is installed, we need to set environment variables for JDK path in Jenkins. The path would be:
<installation_path>/jdk<version>/To set environment variables for Jenkins, open Jenkins dashboard and navigate to Manage Jenkins>Configure System. Find Global Settings section and tick Environment variables checkbox to enable it.

Click on Add button to add an environment variable. set JDK path as shown below:
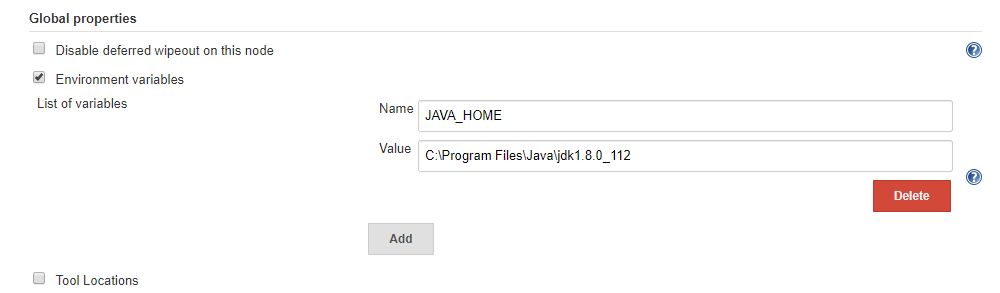
After that, scroll to bottom and click on save.
Setting up Android SDK Tools
If you already have Android SDK installed then you can skip this part and set environment variable for ANDROID_HOME pointing to Android SDK same way we set up environment variable for JDK.
If you don’t have Android SDK tools then you can download it from here. Download zip file for respective platform and unzip it at your suitable location on the disk.
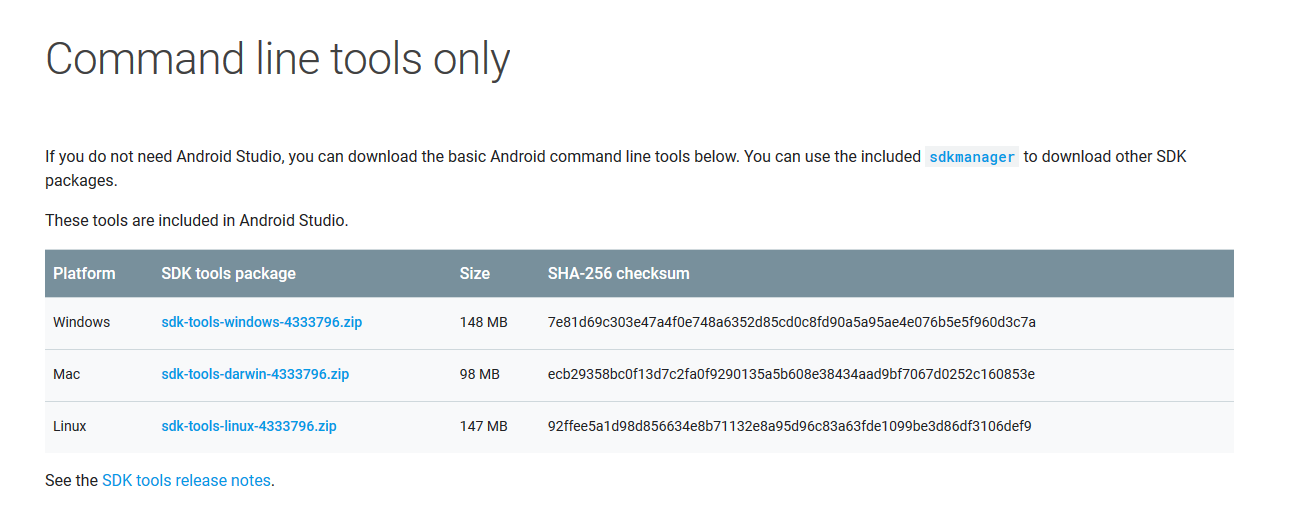
Now that Android SDK tools is downloaded, we need to accept all the licenses to use it. open terminal or CMD and navigate to the unzipped folder(named “tools”) and then navigate to bin directory. First we will update sdkmanager.
For windows:
    // updates sdkmanager
    sdkmanager --update
For Mac:
    // updates sdkmanager
    ./sdkmanager --update
Now we need to accept all the licenses. run following command.
For windows
    // updates sdkmanager
    sdkmanager --licenses
For Mac
    // updates sdkmanager
    ./sdkmanager --licenses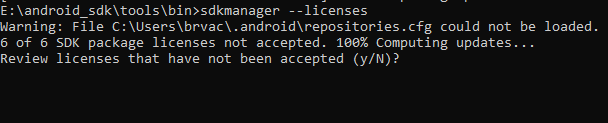
It will show output like above image. enter “y” and press enter. It will then ask to accept licenses one by one. all we need to do is enter “y” and press enter until all the licenses are not accepted and the following message is not displayed.
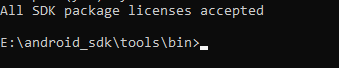
If you miss to accept any license then you can run the command and repeat the process. If all the licenses are accepted then running the same command will indicate that all the licenses are accepted!
That’s it! There’s no need to download build tools and platform tools as Gradle 3.0.0 and above does it for you. However if it doesn’t work for you then you can find
_sdkmanager _commands here to download required tools and platforms.
Now that Android SDK Tools are set up, we need to set environment variable ANDROID_HOME pointing to our Android SDK location. The process is same as we did to setup environment variable for JDK.
Open Jenkins dashboard and navigate to Manage Jenkins>Configure System. Under Global Settings section add new environment variable as shown below:
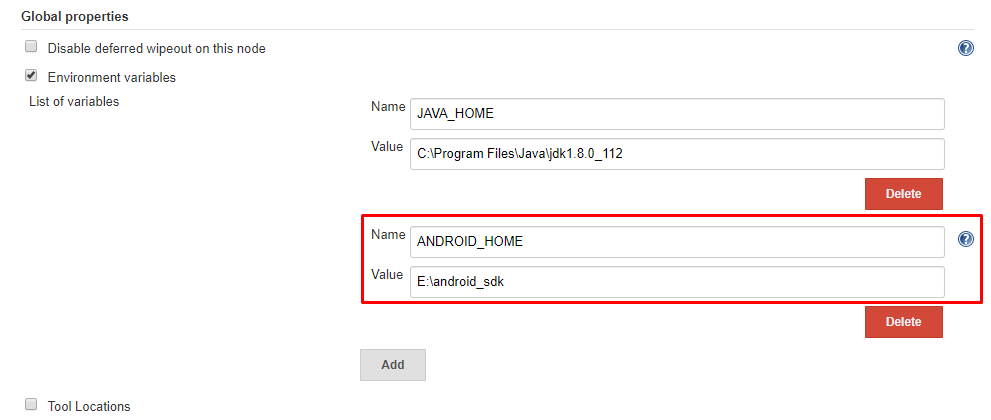
ANDROID_HOME environment variable in Jenkins
Scroll to bottom and click on save.
save.
4. Configure an Android project in Jenkins
Now that we have set up Jenkins for Android, our next step would be to create a new job to build our Android project. Open Jenkins dashboard and click on create new job or new item. It will the following page.
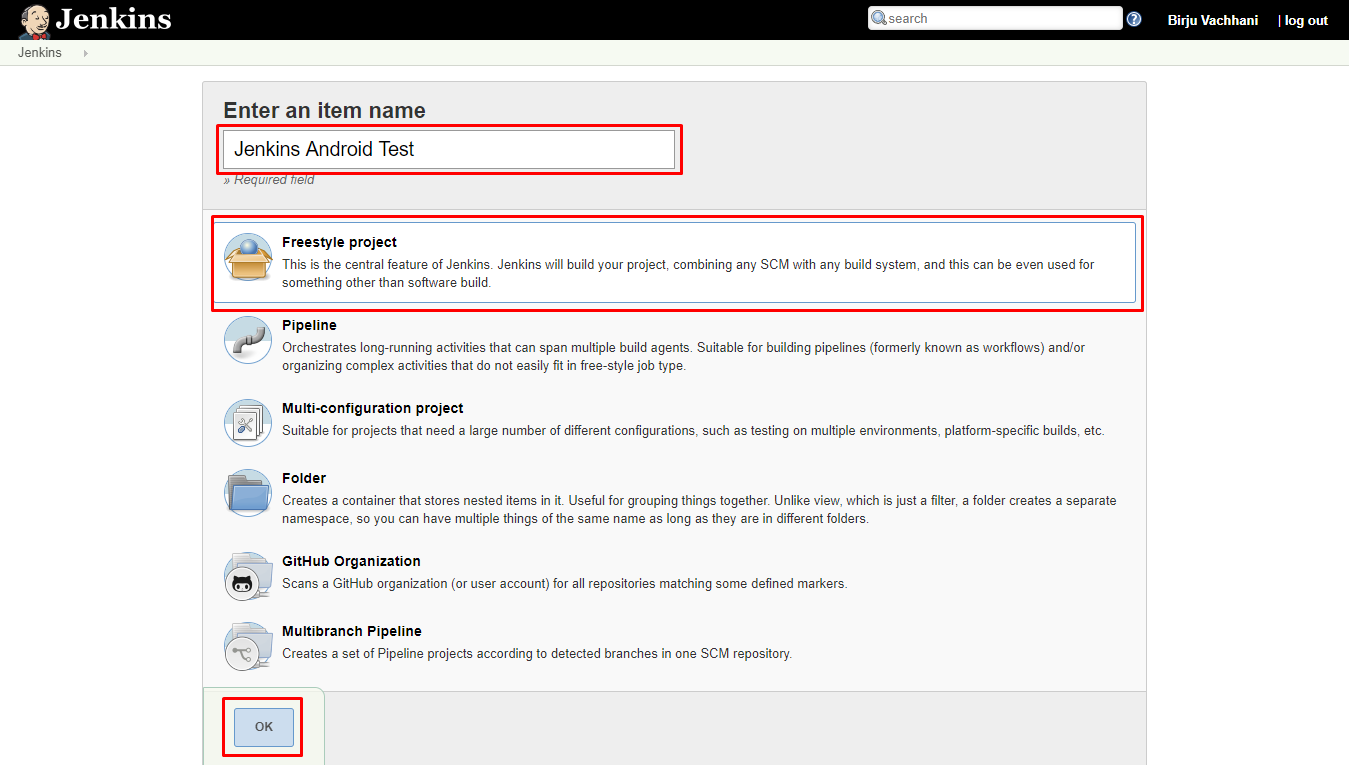
Enter proper project name and select Freestyle Project style. click on OK button to continue.
In the next page, click on Source Code Management tab. Here, we will setup our git repository on which we want to perform build operation. Select git option under this section, copy and paste repository URL. It will show something like this if the repository is private:
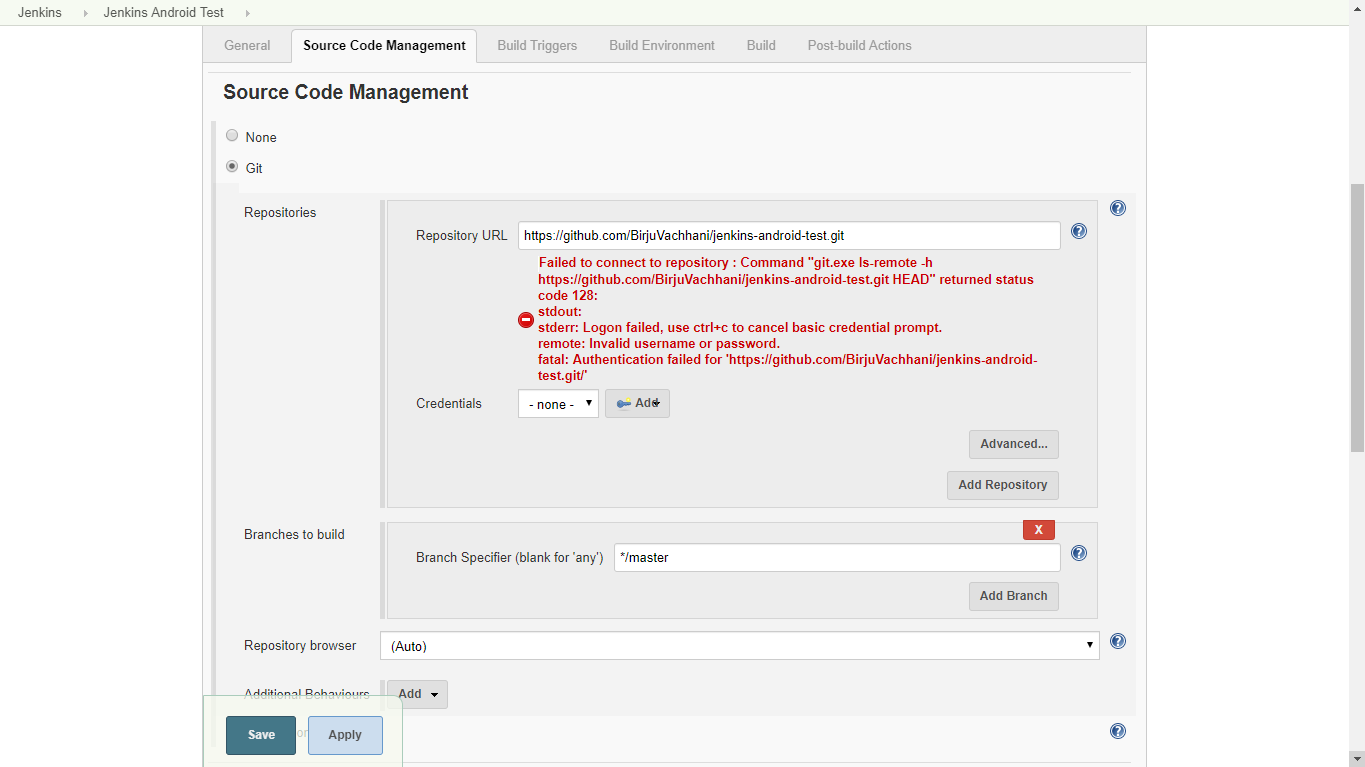
In case of public repository, we don’t need to give credentials to access the repository and you won’t get this error but if the repository is private then we must need to provide correct credentials.
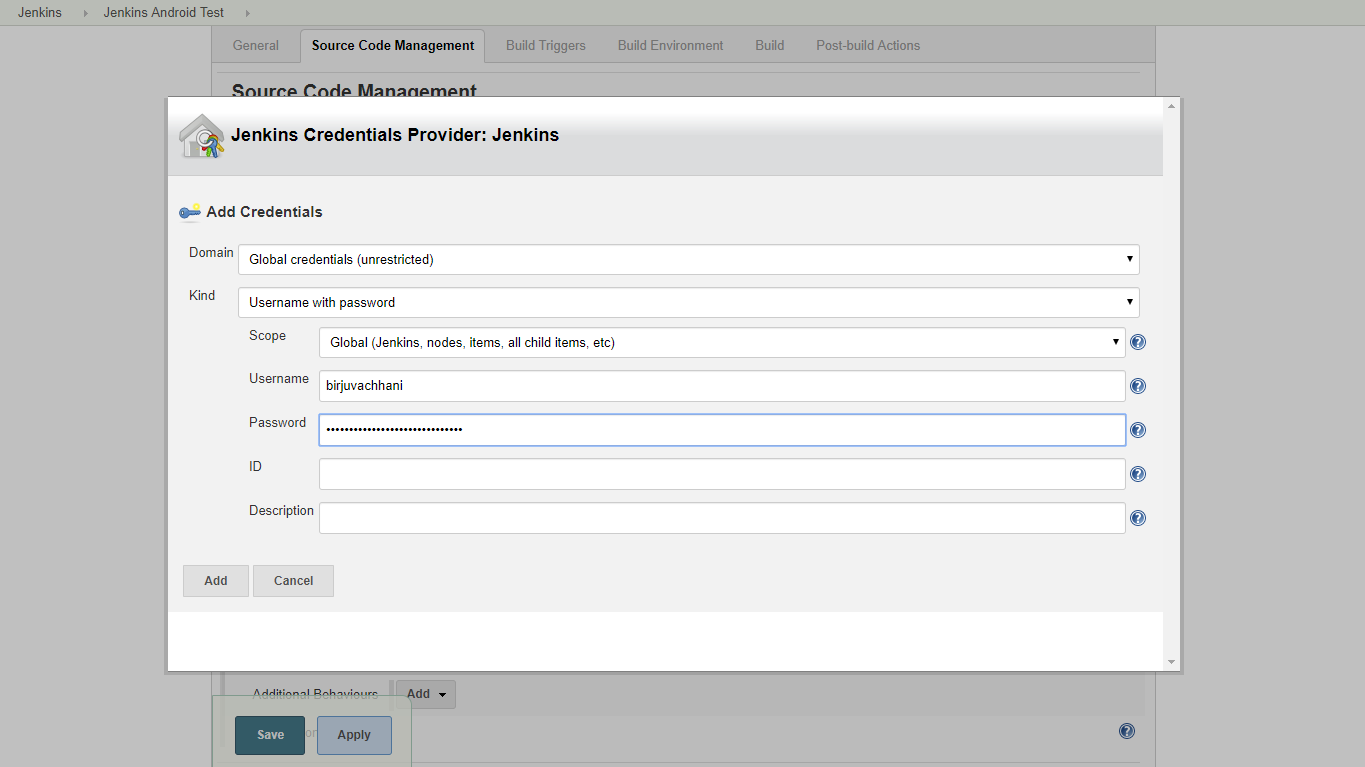
Click on Add button under Credentials section and then select Jenkins credentials Provider to add new credentials. Add required information as shown below:
Click on Add and then select the added credentials from the drop down under Credentials section. Those errors should be gone now. After that, we need to specify on which branch we want to build our project.
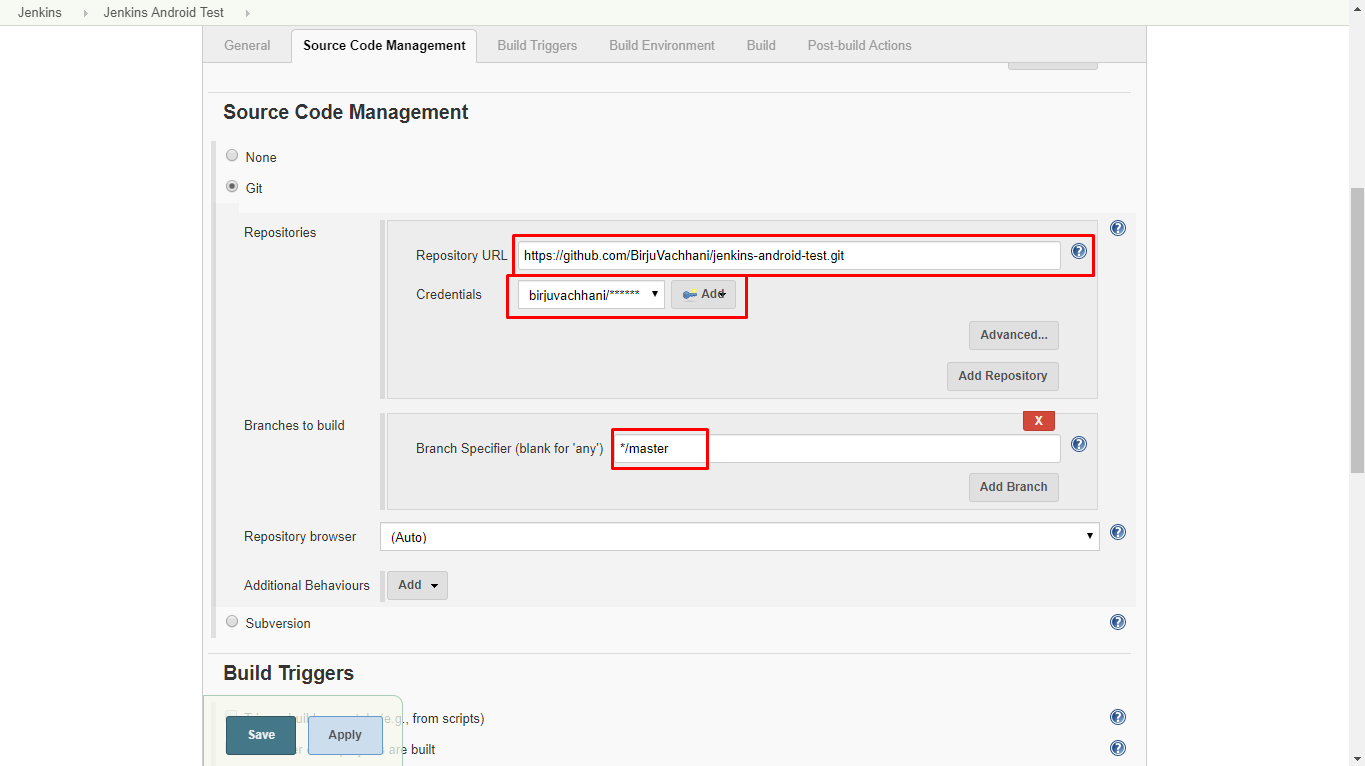
Jenkins will use these settings and clone repository every time we build our project. We are not setting Build Triggers and Build Environment for now for the sake of simplicity.
So far we set up how to get source code. Now we need to tell Jenkins how to build our project. Navigate to Build section, click on Add build step button. There are two ways we can configure build process for Android.
- Execute Shell script/ Windows batch command
- Invoke Gradle script
First way is used for advanced configuration. We will go with second way: by invoking Gradle script to build our project.
There are two ways we can invoke Gradle script as you can see:
- Invoke Gradle Script
- Use Gradle Wrapper
Invoke Gradle Script
By selecting this option, Jenkins will use Gradle installed on host machine to build our project. For this, we need to tell Jenkins which Gradle version to use to build project. Make sure Gradle is installed on your computer and require paths has been set in environment variables.
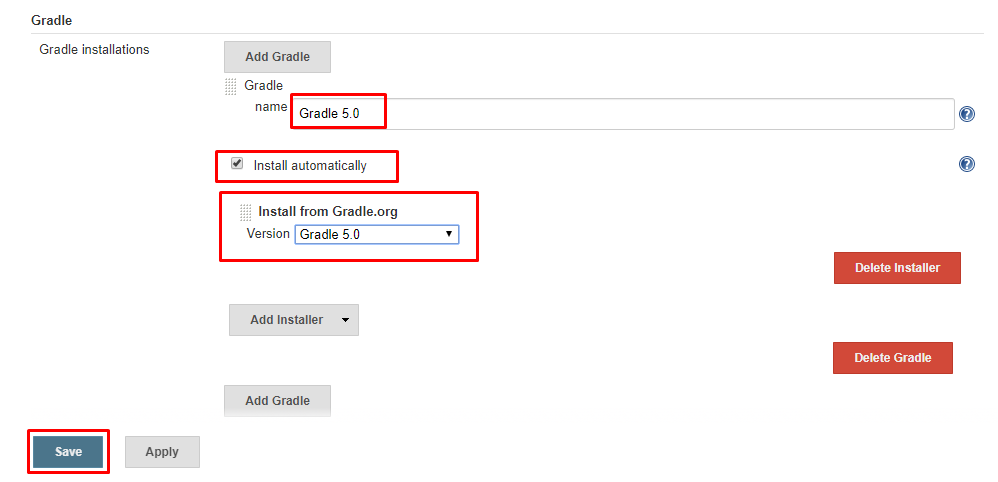
By default other versions are not available. Default means the latest version. To avail other versions open Jenkins dashboard and navigate to Manage Jenkins>Global Tool configuration. Head to Gradle section and click on Add button. Give a name of your choice and select a Gradle version of your choice as shown below. After that click on save. Now other created version will be available for our job.
Use Gradle Wrapper
A better option is to use Gradle wrapper specified in the project source. As we are using the same Gradle version that was used to build project locally in Android studio, it is less error prone as there might be some compatibility issues with other versions. we are going to use this option for our project.
Make sure to check “Make Gradle executable” option. For this option we require Gradle wrapper location. You can find the wrapper into your project directory which is inside the workspace of Jenkins. We will provide it as shown below:
_Remember, project root is referred by _
_${workspace}_variable in Jenkins.
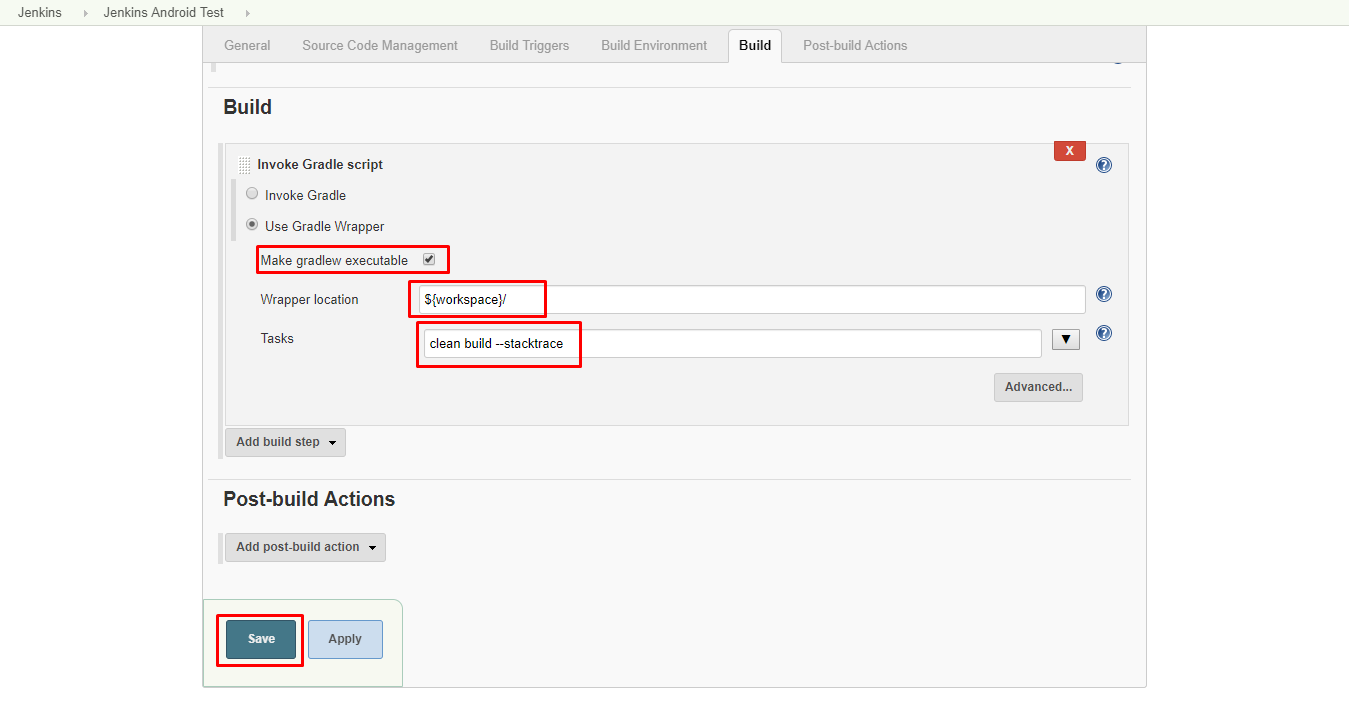
After that, we need to tell Jenkins which Gradle task we want to execute. Here, we want build our project and generate APK so we will first clean project and then build it. Therefor, clean build command is added. However you can add any Gradle task here to execute like: assembleDebug. the option — stacktrace is added so that we can see the stack trace of build process if something goes wrong and it fails to build.
Bonus
If you’re facing problem like this or similar (something to do with file not found which is autogenerated file):
C:\Windows\System32\config\systemprofile\.gradle\caches\transforms-1\files-1.1\appcompat-1.1.0-alpha04.aar\3ffce2b6cda8e1064645b95c35c5d11a\res\layout\abc_action_bar_up_container.xml: error: file not found.This is the problem of Gradle caches and user permissions. The best way to handle this and ensure that it will not happen in future builds is to use custom Gradle cache directory.
Create a directory (e.g. gradle_home) somewhere other than the private directories for a user or restricted directories.(e.g. for windows, other than C drive).
After that, we need to add an environment variable to tell gradle which directory to use for its caches. copy the directory path the we just created and open Jenkins dashboard. Navigate to Manage Jenkins> Configure System. Under the Global properties section add another environment variable named GRADLE_USER_HOME as shown below.
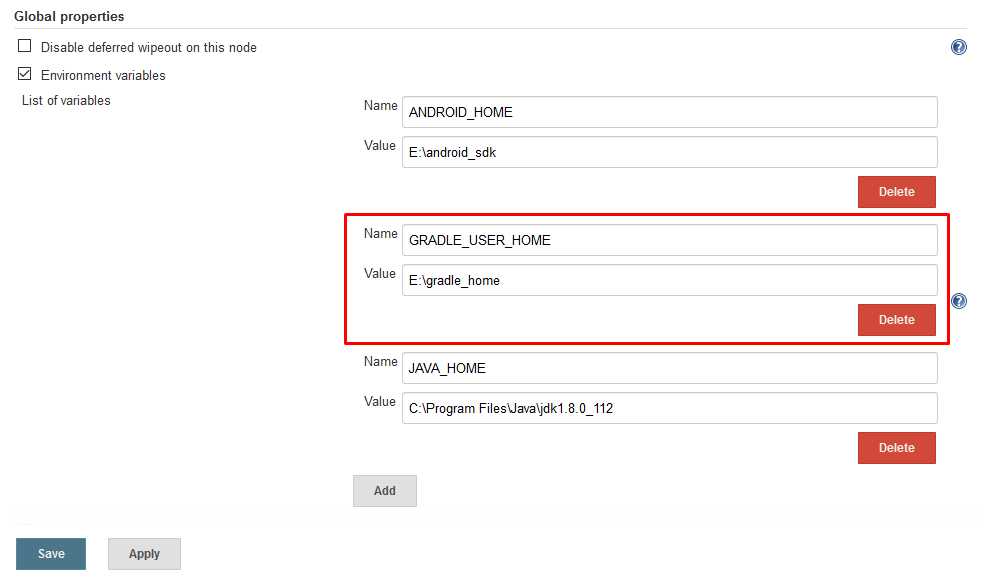
Click on save and the setup is done!
5. Build Android Project
To trigger build, open Jenkins dashboard and select the project/job. On the project/job dashboard, click on Build Now option on the left side panel. After that, it will display running build in Build History section as shown below:
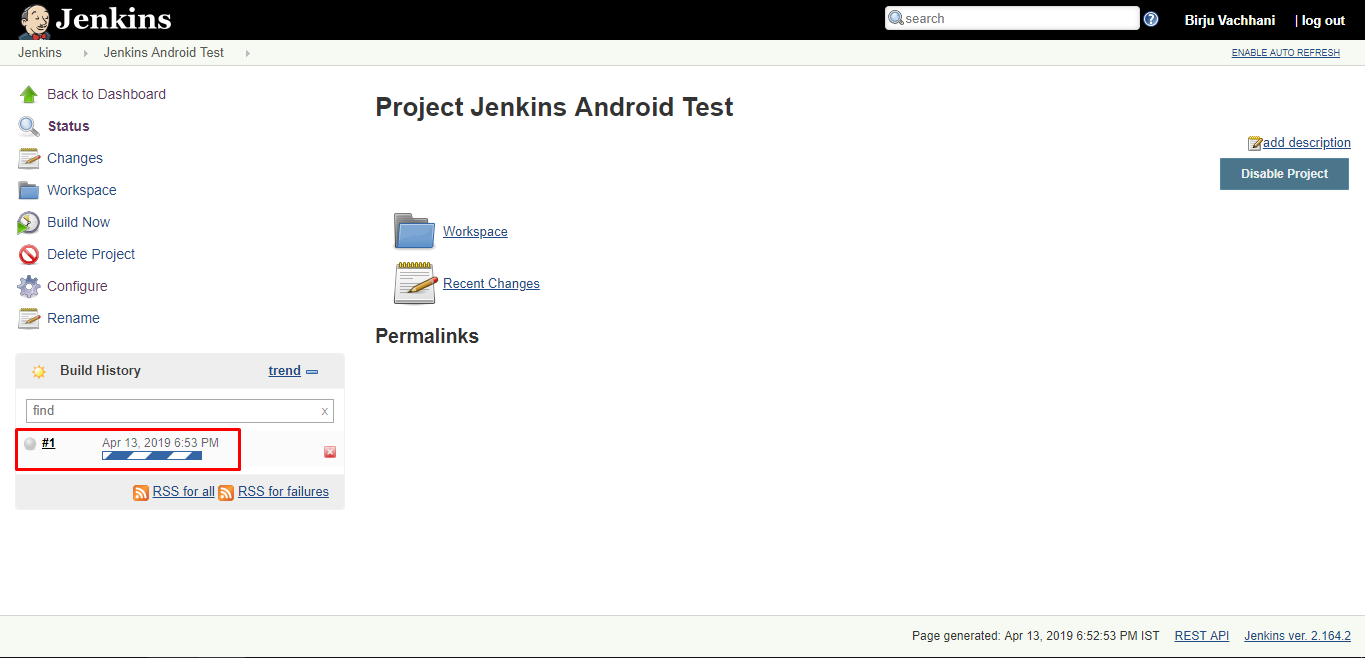
The blinking gray dot means that the build is on going. Click on that dot to see console output as shown below:
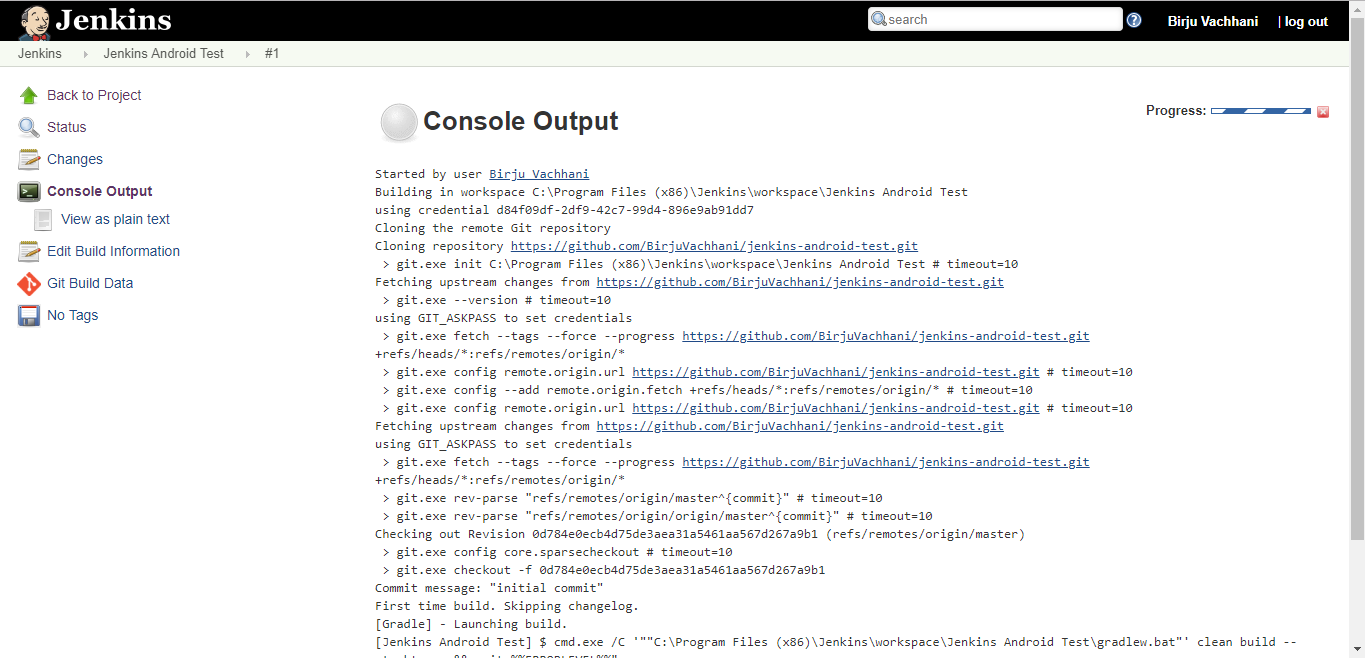
If something goes wrong then the dot color will turn to red and if everything is okay and build is successful then the dot color will turn blue. For the first time, it will take time to build as it might need to download required Gradle wrapper, platform tools, build tools, etc required files.
6. Archiving Artifacts(APKs)
So, you build your project successfully but what about the generated output (APK)? How can you get previous build result? Well, Jenkins provides a way to archive outputs of each build. Isn’t it good if you can find every APK that has ever built by Jenkins?
To archive build outputs, open Project dashboard and navigate to configure page and click on Post-build Actions tab. Under Post-build Actions section, click on Add post-build action button and select Archive the artifacts option.
Now we need to tell Jenkins, which files to archive. We want to archive APK that is generated as an output of the Grade build process. So we will provide path for that APK. By default, the APK is stored at the following path
<project-root>\app\build\outputs\apk\debug\So will tell Jenkins to archive all the APK files in this directory. Now, the path already has context of workspace so don’t need to use ${workspace} variable. We can directly write relative path. It also supports wild cards.
Write output path as shown below:
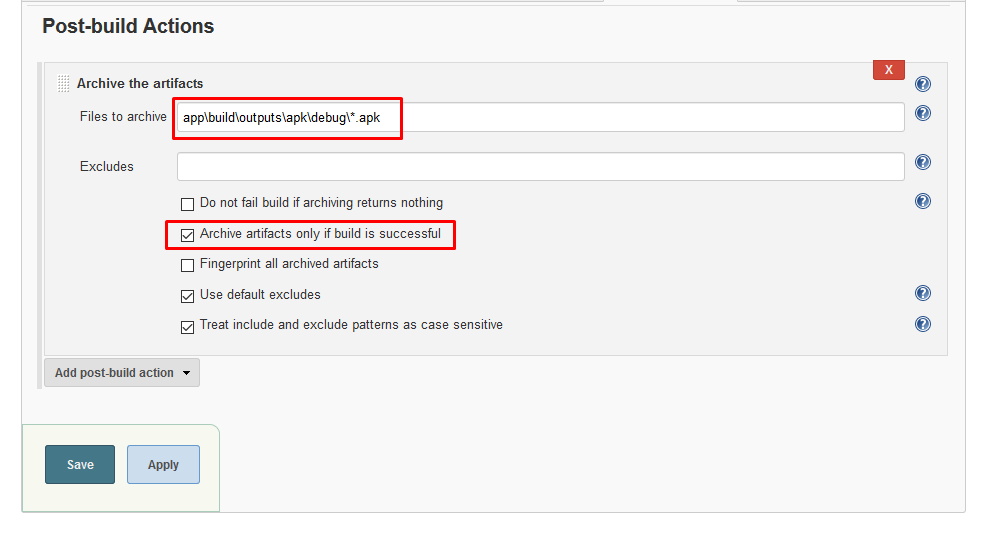
click on Advance button and check Archive artifacts only if build is successful option. click on save and build project again. After your project is built successfully, navigate to project dashboard and select the last build from Build History section. on the build dashboard the archived artifact will be shown like this:
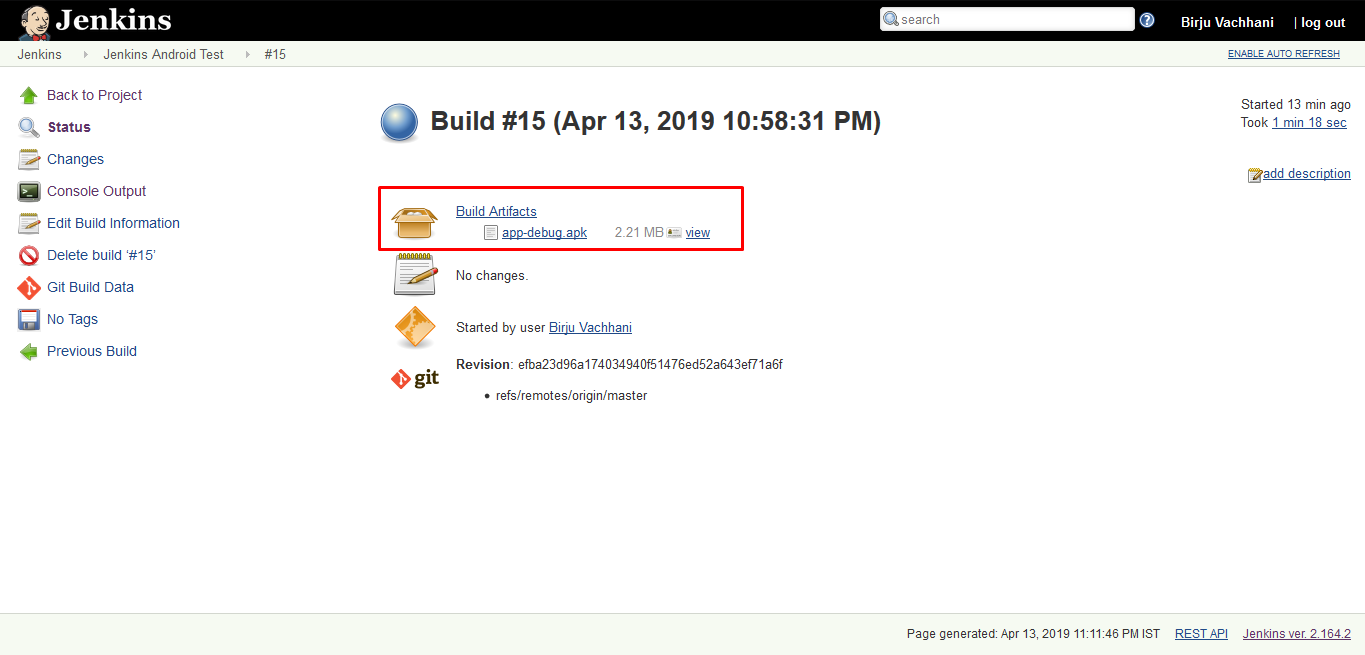
Every successful build now on will have the artifacts archived. You can also download artifact by clicking on it.
Conclusion
There might be other methods to start with Jenkins and Android, but I found this as the best working way to get the ball rolling in a hassle-free manner. You might encounter access permission issue for both Windows and MacOs. But not to worry. Check those at first place and then proceed. Further, there are a few ways of doing the configuration (setting environment variables, configuring gradle, etc.), you can try other ways also that suits your goal.
Thanks for reading! If you liked the article, don’t forget to clap! Happy coding folks!